Monday, May 30, 2005

Clent Hills - Worcestershire

It's hardly a demanding ride in terms of
technicalities, but more often than not I find
myself riding places where the missus can come
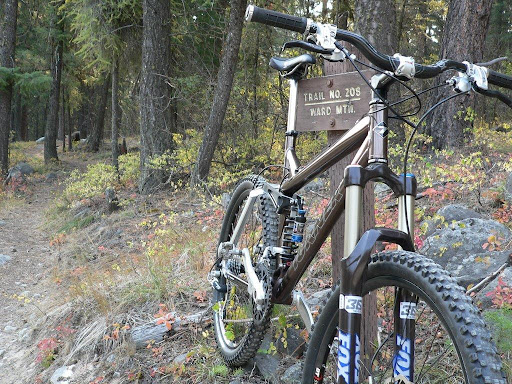
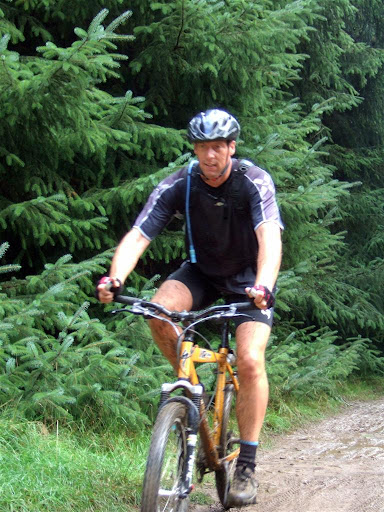
along too. So, on the cusp of Brummie suburbia, just west of Halesowen, are the Clent Hills. They afford gorgeous views of the countryside (well, except for the one side, which offers a view of Birmingham, of course) and there's sufficient pubs spattered around the area to keep you entertained.


The one thing they do have, and forgive me for stating the obvious, is hills. There is very little flat riding here - you're up and down like a jackrabbits' arse all day - so it's great training on the old pins if you need it. There's no real challenging rides that we found, but there's certainly some interesting speed sections including a nice, fast, gravely downhill section towards the start with muddy bits to catch you out.

If you're okay with the uphill stuff (or willing to take your time) and fancy a gentle days riding around the area, there's worse places (and there's better, I imagine). I could have sworn there's a downhill course there from yesteryear but I didn't see any details of it, and a quick google search didn't throw anything up. It's one of those places where I imagine local knowledge would turn up some much more interesting bits.

As it stands, it's a good days exercise...

Saturday, May 14, 2005

Shimano W101 - Winter Boot

Anyone who rides in summer shoes during the depths of winter and has experienced icy tooties even though they're wearing winter socks will appreciate a decent set of winter boots. True, it's possible to make do but as I commute throughout the year I soon decided that dry and warm feet were essential.

I tried on a number of winter booties from the likes of Northwave, Diadora and Shimano but it was only the latter's W101 that felt comfortable. I normally take a UK size 10 and these needed to be a size larger (euro 46) to still allow a good thick sock or even a couple of mid layers to help keep the cold at bay.

There are no shoe laces to get soggy and the dual velcro straps have been 100% reliable. You also get a 3rd velcro fitting which wraps a semi waterproof neoprene "entension" around your ankle that helps to prevent water running down your leg and filling up your boots. These aren't 100% waterproof and will eventually allow water to ingress over longer rides but they will still be toasty inside. The tread isn't very aggresive and does clog up in deep mud but then what doesn't ? The compound seems durable they're actually ok to walk in, even with the ankle strap. The boots feel rubbery rather than plastic-y and have survived many a rough and tumble with hardly any marks. The SPD fitting doesn't need cutting and hasn't given me any problems i.e. hot spots on the sole of my foot.

If you have a 2nd set of cycling shoes then you'll find that both pairs last twice as long !

Overall, I'm very impressed with just how warm these keep your feet although they'd be better if they were 100% waterproof. 9/10.

Protective Tape

In the past, I've tried a couple of sets of protective patches that are designed to stop cables rubbing paint off your steeds frame (incl'g some wickedly expensive carbon-esque patches from Pace) and non of them seem to stick. I've gone to the effort of thoroughly cleaning the area, warming the patch and even pressing the sucka into position until my pinky's hurt. All to no avail.

However, peeps over on Singletrack seem happy with stuff called "helicopter tape" which I know to be tenacious stuff from my days playing with RC choppers. A quick surf and I found that a bike related outlet called Just Riding Along market such a transparent film. Their smaller 10 x 25cm option will easily accommodate two steeds even if you include additional patches for battery's, etc. The best bit is that it's very competitively priced, especially when compared to the useless patch kits.

In use this stuff is sticky, very sticky indeed and will quite happy curl and more importantly stay curled around headtubes, toptubes, etc. It doesn't wash off and hasn't yellowed when exposed to around a years (to date) regular exposure to sunlight. Ten out of ten.

Friday, May 13, 2005

Shock Pumps

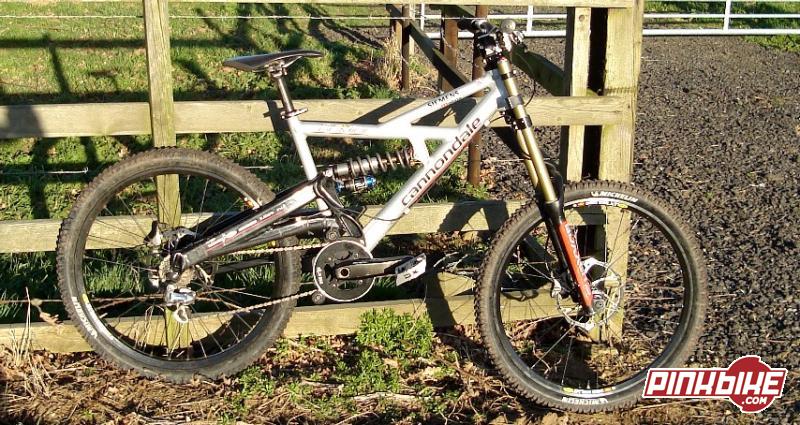
Air shocks have now become thoroughly established in MTB suspension design, in part to the increased reliability of seals, their inherent light weight over a coil spring, compactness and tuneability - changing a coil spring is a costly affair unlike changing air pressure. All you'll need is a shock pump which'll cost roughly what another coil spring would but is so much more flexible.

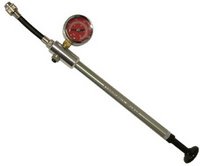
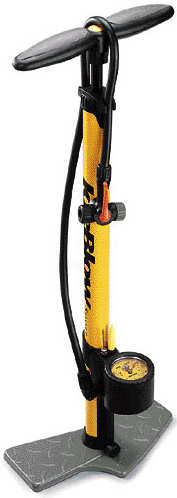
Around three years ago, the choice of shock pumps was quite limited and this Brand-X unit was pretty much all that was available. However, it has a clear and accurate gauge up to a thumping 300psi, a blow off valve enabling you to accurately set the psi and a flexible hose (albeit short) that helps when fitting and pumping. All it's needed throughout it's life is an occassional regrease of the internal o-ring.

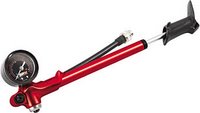
However, with the recent domination of air can's lots more shock pump desgins are now available. They're typically smaller, lighter and have a folding flexible hose that makes fitting and storage even easier. The one shown here is a Marzocchi copy and look remarkably similar to those supplied with Rockshox and Manitou equipment. The gauge and blow off valve still remain so the earlier units got something right.

When acquiring a pump you need to be certain whether your shock is a high (up to 300psi) or low (up to 175psi) unit to acquire the correct pump. You'll typically find that Fox bouncers are high pressure whereas any 5th Element, Rockshox, Manitou's SPV and Marzocchi shocks are typically (tho not exclusively) low pressure. Using a high pressure pump on a low pressure shock is viable but they're not accurate enough to accommodate the smaller range of adjustment. The fact that shocks can be used on forks and shox's can make for an interesting set of pumps in the toolbox but most bikes now tend to use either high or low pressure and not a combination - although it's not unheard of.

The valve outer (thread) can often cause a few headaches as we've found that the 5th Element and Cannondale valves are slightly smaller than say a Fox.

Thursday, May 12, 2005

Trackpump : Topeak JoBlow Sport

If anyone has more than one bike to maintain then they'll definitely benefit from a large capacity tyre pump that inflates tyres twice as quick as a standard, small bicylce pump that you take along on rides. You'll not get rsi or a floppy arm from those dozens of stroke you'll need with a small emergency pump.

I acquired a Topeak JoBlow Sport trackpump a number of years ago now and it's still going strong. The valve head is compatible with both shraeder (car type) and presta valve's and it always provides a good seal. The gauge is clear and located at the base of the unit so it's less likely to get broken if it topples over. The parts all look durable and study, the shaft / base are metal rather than plastic and the handle is rubberised for a comfy feel.

The gauge is also handy as it allows you to accurately increase the tyre pressure which is often useful if you typically ride XC terrain and are off for a wkend of hurting down mountain steps. I find it also helps when setting both Chipmunk's and my tyre pressure as we both prefer different psi's which often can't be properly gauged by just squeezing the tyre.

Inflation is a doddle once you've planted your slabs of meat on the base it only take a dozen on so long stroke to get 30-40psi whacked into your knobbly's. Easy peasy.

Wednesday, May 11, 2005

Chain Cleaner Gizmo

Over the wkend, Brumster was praising his chain cleaner and how easy it makes the whole process of cleaning the most moving parts on your steed, especially after a grubby ride. Although I've used one for years I'd kinda lost sight of just how useful and efficient they are.

We both use an early incarnation of FinishLine's kit which snugs shut around the chain and rear der allowing you to back pedal the chain through three scrubbing brushes and a set of cleaning pads. Prior to clamping the chain you need to put in a few mills of degreaser, citrus based is more eco friendly. After just a few cranks the degreaser starts to dis-colour and the chain to gleam again. It only takes a dozen revolutions or so - but a few more won't hurt :p Incidentally, the manufacturer's website has some snazzy video's that explain the whole process much better than I can.

But why bother ? First and foremost a clean chain means crisp, clean shifting which gives a much more pleasant ride. Secondly, a clean drivetrain will last longer and not need costly replacement if you regularly clean it down. A chain is so cheap but if it's left dirty then it'll take no time at all down grind down the more expensive cassette, chainrings and der's.

Over the years my cleaner has proved itself and is still going strong which is probably down to how simple the construction is. It's very easy to take out the brushes out for the occassional clean as they just rest inside a couple of grooves. I dread to think how much degreaser I've used but atleast it's mostly been environmentally friendly stuff.

I see that most of the latest FinishLine kits don't have a der hook and rely on you holding the unit whilst cranking, which is fine if you have a stand to hold the bike.

Update, Mar'06 : As one of the brushes within my original kit is now reluctant to stay put (the sides have splayed out) I figured that it was time to acquire a replacement kit. After some surfing it appears that the "old" design has been replaced with this "new" unit.
Although it now no longer seats on the rear der the new unit is sweet to use and the magnet in the base helps to retain any metal shards, the angled operation and extra tension, sealed exit and new brushes mean that the chain comes out much cleaner - definite proof that it needed replacing. So it seems that they've improved a product that was already a winner.


Tuesday, May 10, 2005

Park Chain Checker

There's a generally accepted theory that a chain will bed in and wear out much quicker than other drivetrain components. If you leave a worn chain on it'll rapidly wear out the chain rings, cassette and jockey wheels which isn't logical as they cost much more than a consumable and relatively cheap chain.

So how do you know when a chain is past it's best ? You can measure the length of 12 links (rivet to rivet) which should be less that 12 1/16", anymore and you'd best start looking to replace it. Another technique is to use a "chain checker", which is a little gizmo that tells you the wear without needing a tape measure. I use a Parktool Chain Checker (cc-2) which shows stretch as a %age.

A positive benefit of using a chain that's in good working order is that you'll have slicker shifting, with a drivetrain that doesn't skip, suffer from chain suck and last longer saving you money for more UGI (upgrade-itis).

Links; Sheldon Brown has some useful info on all things chains, including "stretch".

Monday, May 09, 2005

Wrench Force Prep Stand

If you've ever done more than 5minutes work on bike then you'll really appreciate a device that holds the cycle securely while you've both hands free to do some spannering. Enter the bike repair stand.

The Wrench Force stand has an adjustable top clamp which can be tuned to grip different diameter seatposts and frame tubing. The clamp itself is a soft plastic with handy grooves for gear cables to route through. The clamp can also rotate through 360-degrees for convenient bike positioning. It has a sturdy frame with a wide base for good stability, but it's weight means that it isn't really portable and is best suited to the workshop. The legs and clamp fold flat for storage, it has a telescopic height adjuster, which means that even tall mechanics can wrench without bending over.

I acquired mine around 2-3years ago from Leisure Lakes and recall that it was slightly discounted to around £100. It might seem expensive at the time but not if you factor in the savings from doing servicing yourself, especially if you have more than one steed to maintain. I've recently had a hunt around the web and can't find many online outlets for this toolstand. It also appears that Wrench Force is a subsiduary of Trek and that Snap On make them, but don't quote me on that.

I've had no problems with it and really appreciate the convenience it supply's. Routine maintenance is now a joy.

Update: the only addition I've recently made is to tack on a Topeak Tool Tray which helps to keep those tools close to hand.

Sunday, May 08, 2005

On-One Inbred Stem

In an effort to lighten up my trusty ol'Marin, I ditched the oem stem and replaced it with a tasty looking number from a little known British manufacturer On-One. It's called an "Inbred" stem which isn't some Welsh joke but a reference to their own legendary hardtail.

The stem itself is nice and light 140g, has nicely rounded edges which won't damage your bars, a secure and neat four bolt clamp, cost a respectible £25 and has some snazzy company logo's. The downsides are the clumsy steerer bolts on the back which don't seem to follow the same attention to detail seen elsewhere and the fact that it only comes in limited lengths (80/100mm) with a 5 degree rise.

In use it didn't give any creaks or work loose and was fine for general XC riding with the odd rocky Welsh trail thrown in.

Update: I see that it's recently been discontinued (Jan'06) and replaced with a new 3d, forged unit that now comes in a bunch of lengths and rises for no extra cost.

Saturday, May 07, 2005

Topeak Defender Mudguards

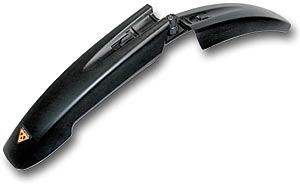
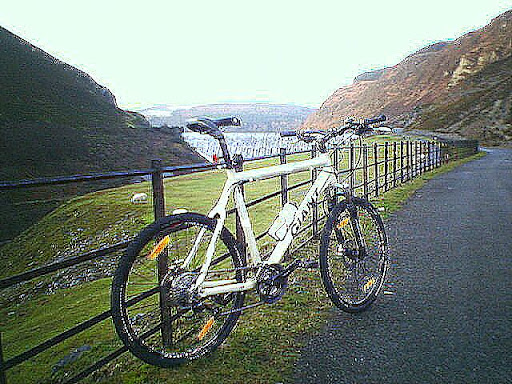
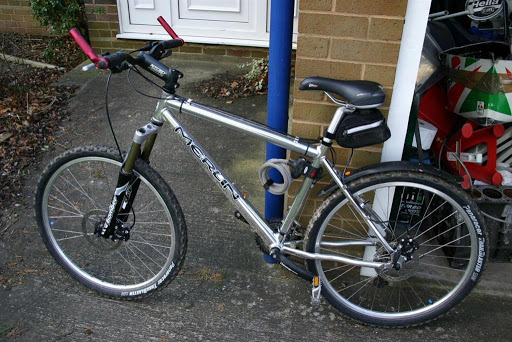
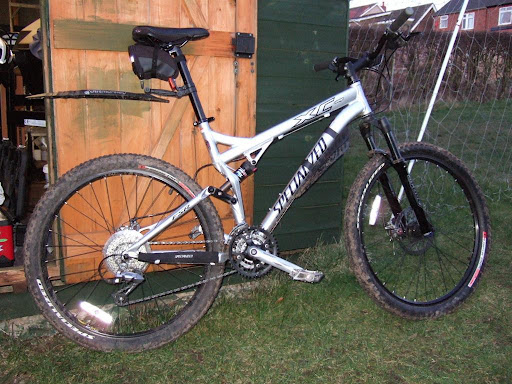
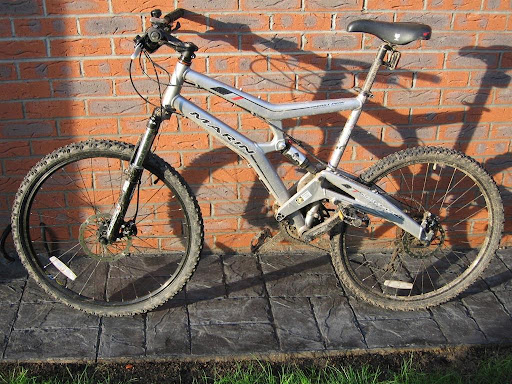
On my trusty ol'Marin we used two Topeak Defender front mudguards but both fixings didn't last more than a few wks and were always falling out before they finally gave up the ghost.
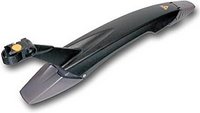
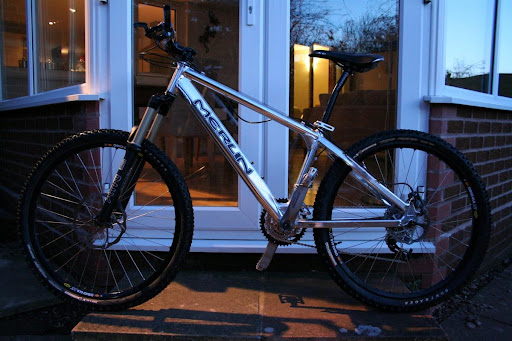
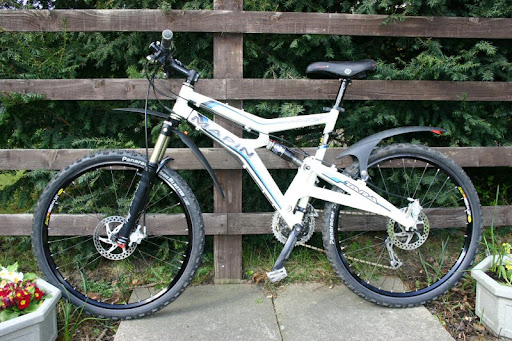
Chipmunk has been using the Defender rear guard for a while now and as it's still working I figured that it was worthy of a mention. The shape is much broaded than my SKS X-Dry and should keep more crud off her back, it also had an adjustable front section to help keep the front mech (or shock if so positioned) cleaner. The fixing is a fiddly twist afair and not exactly quick release as you easily loose your tension setting. I've found that removing the seatpost is the best option. The mounts are all rubber coated and help to resist running out of alignment whilst happily riding along and the twist lock seems a little more secure that my SKS quick release mount.

SKS Mudguards

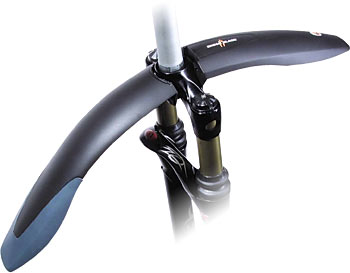
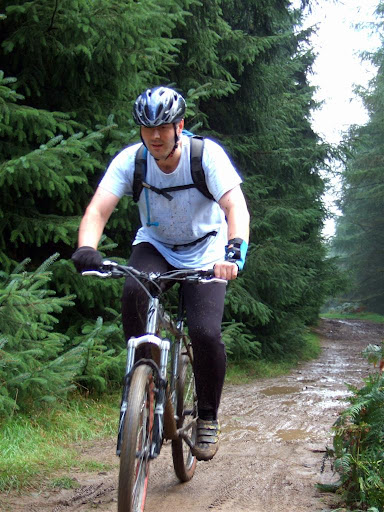
I'll ride all year, in all weathers but if only if I can help to prevent getting a nasty wet ar$e. A front mud guard also helps to keep the mud out of your mug as it's being slung from your rapidly accelerating front wheel whilst you whiz downhill - when you need to be fully focused.

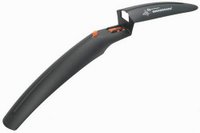
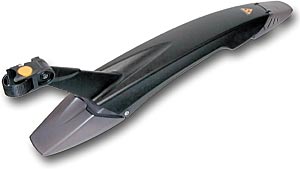
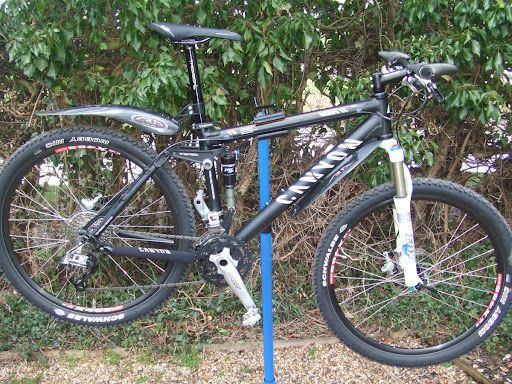
Up front, I'd previously tried a Topeak Defender guard and the fixing lasted all of a month before it disintegrated. So I shopped around and acquired a SKS Shockguard which has a much more secure fixing and is lasting well. It also comes in a range of options e.g. compatible to reverse arch forks (Manitou, Pace) as pictured on the right, has a good shape for keeping the muck off and later models have soft, rubberised edges.


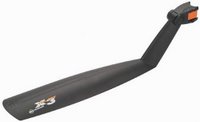
I'm also using the SKS X-Dry rear mudguard which has an easy seatpost, quick release mounting system that is rubberised to help prevent slip and chaffing. Whilst you can tighten the guard into position it'll occassionaly wander out of alignment with your rear wheel but you soon start to notice once the dampness creeps in. The overall shape is good and once fixed into position you can still raise or lower it to get the best cover.
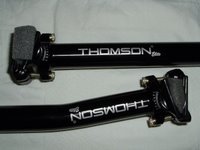
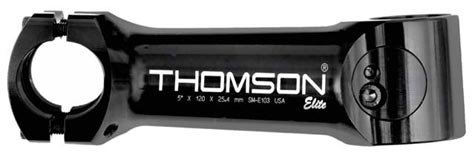
Friday, May 06, 2005

Isopropyl Alcohol

When you've a bike with disc brakes it's important to keep them as clean as possible, which is especially important when your re-lubing your chain, bleeding hydraulic brakes and generally squirting around cleaner or lube.

But what to use ? For a long while I used methylated spirits which doesn't leave an oily residue like white spirits and generally worked well. However, more and more people are now using isopropyl alcohol as their preferred cleaner - it's similar to car brake cleaner but with the oils removed.

Initially I hard trouble sourcing it as my local chemists didn't stock it, but I eventually identified that Maplin stock some as a printer circuit board cleaner, part# RE71N. The aerosol dispenser makes it easier to use than a cloth (clean) over a bottle of meths too.

With this stuff around, if any lube makes it to the disc it is easily removed and although it will evaporate, I tend to wipe off the excess with a clean, lint free cloth/tissue. I've even doused slightly contaminated pads in the stuff with no ill effects.

After use, you may find that the brakes take a few pumps to get the disc and pads biting again but you shouldn't get any squeal that some cleaners tend to impart.

A final word of warning tho, keep it away from forks and shocks as it'll such the lube out of the seals/bushes and kill off your bouncers double quick.

Thursday, May 05, 2005

Thomson Elite Stem

In an effort to try and keep some consistency when building my Turner I decided to use a matching stem to the Thomson seatpost I'd already opted for. At the time Thomson only produced one stem called the Elite, so Chaybo included one in my shipment.

Upon arrival it was clear that it oozed the same quality as the seatpost I'd previously used with great sucess. The four bolt face clamp provided a very secure yet gentle fixing for my carbon riser, it appears to use the same rock hard anodising, comes in numerous lengths and has a fairly unique steerer fixing system. Two opposing bolts draw two half of alloy together around the steerer tube that is nested within the smooth, rear face. This also means that you're not going to crack you knee on a fixing bolt should you slip or be clumsy. In use the fixing hasn't moved although some people have suggested that might be the cause of creaking.

Wednesday, May 04, 2005

Thomson Elite Seatpost

After using a 
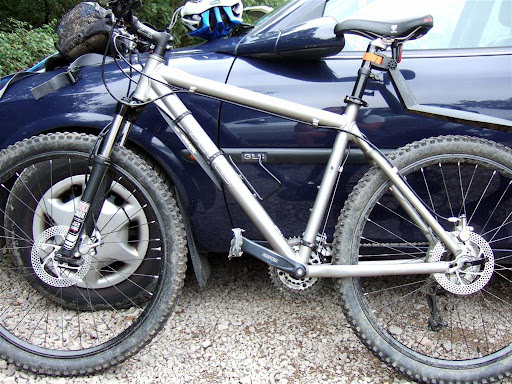
Thomson seatpost to good effect on my ol'Marin, I decided that another had to be sought for my Turner. The 40%ish saving to be had whilst acquiring them from the USA also had an influence ;-) So much so that I initially had both a straight and layback version sent over, as I wasn't sure which would best suit me and my medium frame.

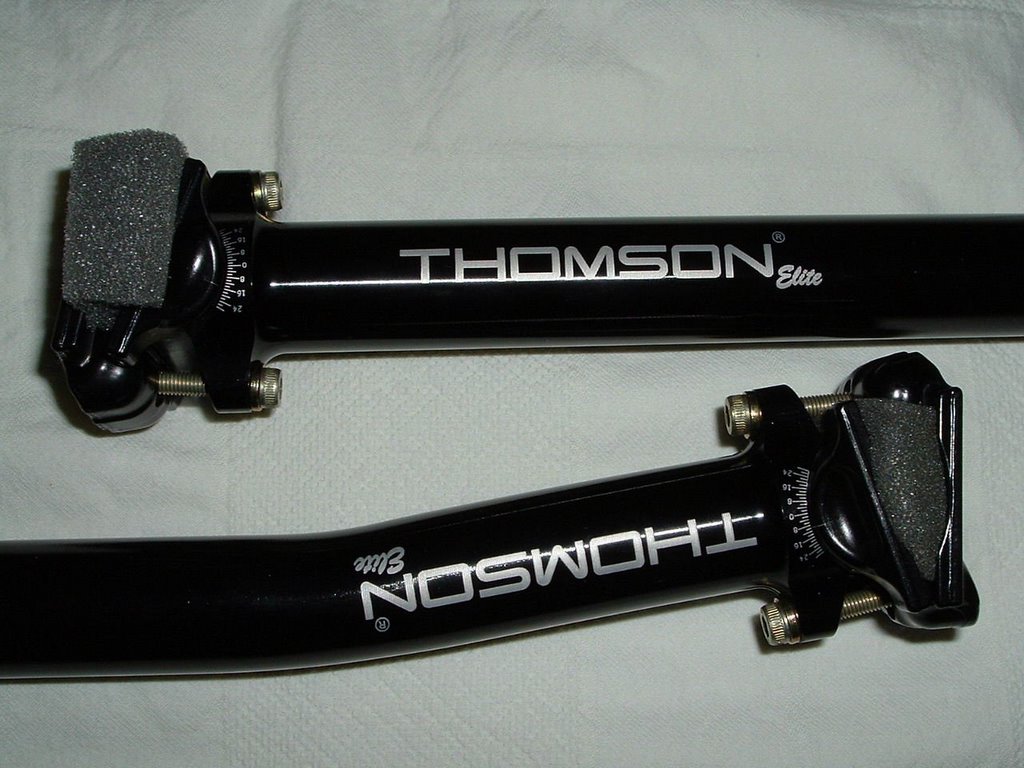
The workmanship that goes into one of these posts is amazing e.g. the hollow post is ovalised in just the right place to help reduce weight yet retain strength, the ribbed post helps prevent unwanted slip, the annodising is some of the hardest in the business, the head is double clamped whilst being minutely adjustable, it even has angle marks for the ultimate in fine tuning, comes in loads of diameters, lengths, black or silver, in either straight or layback versions (pictured). What more is there to say ?

The only downside I've found after some 4 years of owning one, are that the bolts on the head adjusters are quite small and are easily rounded if you're over enthusiastic. There are lighter posts available but these aren't too heavy and you'll be hard pressed to find anything as durable. To counter the weight argument, I believe that their latest "Masterpiece" seatpost is lighter.
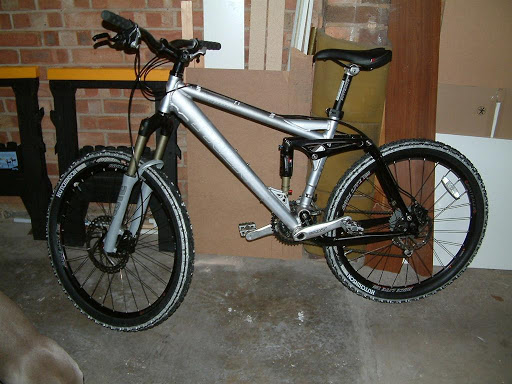
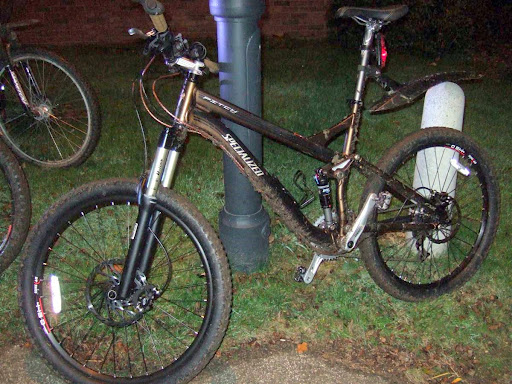
Tuesday, May 03, 2005

Hollowtech II Cranks

To build up my 
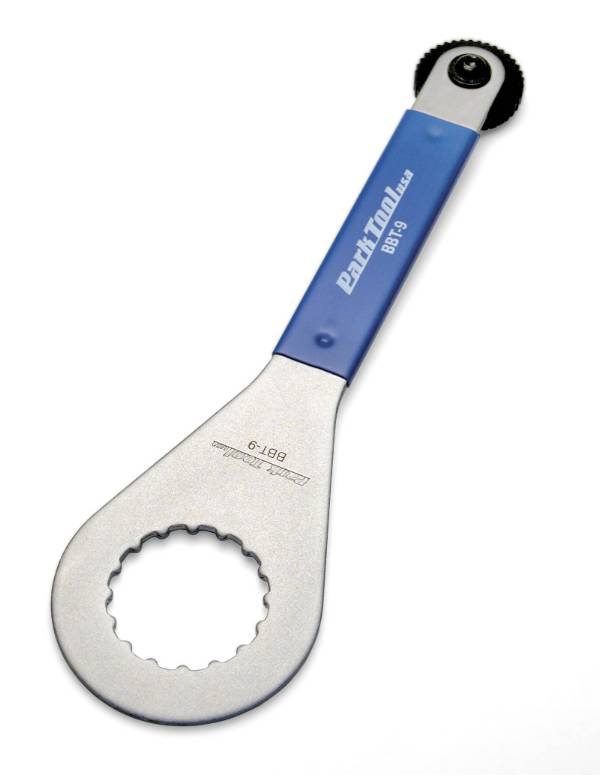
Turner I needed a complete set of components and investigating the crankset's it appeared that the Shimano Hollowtech II system was getting good reviews. The externally mounted bearings were reported to be stiff and much longer lived that the rival ISIS range. As I'd had no problems with the earlier Octalink system which also used hollow arms, I thought I'd give it a try.

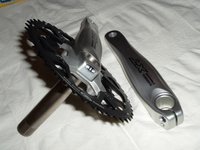
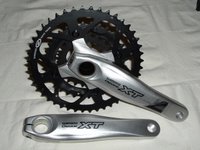
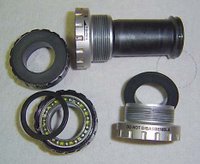
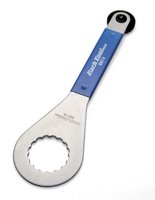
When I opened Chaybo's parcel I was surprised to see how the system works. It doesn't have a traditional / separate bottom bracket, as the hollow spindle is fixed to the crank rings. The bearings are individual cups which snug up to the bb shell on the frame, needing a special tool (Park BBT-9 - which was much cheaper to source from the US of A). Once the bearings are in place you pass the spindle through, mount the splined, non drive side arm, snug up finger tight with the center spinner and finally clamp it all tight with two opposing 5mm allen bolts. To account for different width bb shells the system comes with three plastic shims which I initially left in the toolbox.

Update: In use the system appears to be plenty stiff enough for my paltry legs and after some 9 months and 1,200 miles+ the bearings are stiff smooth and tight. After a few months running, Rob had a look and added a spacer to the driveside which has helped the front mech (which was bent!) acquire a much cleaner up shift.

If you do have any issues with the bearings, Enduro Fork Seals have recently introduced a placement bearings kit for X-type / outboard BB cranksets which looks like it should be more durable.

Monday, May 02, 2005

Maxm MX-5 Carbon Riser

For my Turner, I decided to try some bling carbon bars and our Chaybo highly rated the Maxm bars - which I'd never hard of at the time. Out of the box, they certainly looked the part with a glossy lacquer, had a similar shape to bars that I've liked, good width and were very light.

In use the carbon definitely has a different feel to that of aluminium, tho I find it difficult to explain - so try one for yourself ! The good shape and dimensions meant I was immediately comfortable and confident.

Spec; 1" rise, 7 degree bend, 4 degree sweep, 610mm/26" wide, 136g.

Update: Unfortunately, it's not all been rosy as I've found that the clear coat is easily chipped especially with the sharp edges of my SRAM shifters and Mono M4's. They haven't damaged to bar but it does look ugly. This combined with the number of crashes that I tend to experience is causing me to start looking back at alloy risers which are typically more durable to a clumsy lout like me.

Sunday, May 01, 2005

New Bike: 5Spot

After placing my order early in the New Year all the packages have now arrived and been rapidly transformed into my new ride. Which is just as well 'cos I've been without a steed for about a month, enjoy yourself Dan !

The worst of it is, that I've had an anxious couple of weeks waiting to get out on my shiny new Turner 5Spot but haven't been able to as mrNixon (Manitou's bouncer) was an ill chap after his trans Atlantic journey. Yesterday however, he returned from Raw Experience (UK) after a thorough rebuild come health check and now seems happy to do the whole springy, dampy thang. It's been torture seeing msTurner hanging up half built twice a day as I sulk away on my lardy commuter.

Although I only managed a short and unadventurous ride to start bedding the bits in I'm very pleased with the results. The bike rides beautifully, the brakes are starting to get stronger and my conversion to SRAM thumb shifters was painless. I can't yet tell the difference between the settings of the RP3 yet probably 'cos I'm on sensory overload with everything else.

mrNixon has the lurvely TPC damping and the IT system seems weird in a good kinda way and I'll report back once I've done some pukka climbs. For the record the rebound assembly and lower leg casting seemed to be the issues with mrNixon and not the much slated IT system. Phew, I had a nervous few days with this and thought I'd made the correct choice by staying away from the SPV models. My anxiety caused my flexible friend (bless him) to order a replacement / alternative come backup Pace RC41, which I'm looking forward to trying. I'll post more info and pic's once I get a few more miles under my knobblies.

Finally I'd like to give a big Thanx to Chad at RedBarnBicycles (MT) for supplying such a beauty and putting up with me along the way. Raw Experience (UK) for reviving mrNixon and allowing me to "get out and ride". Oh and not forgetting Keith for the pic's. Posted by Picasa