Saturday, October 01, 2005

Which Perch ? - Fizik Gobi

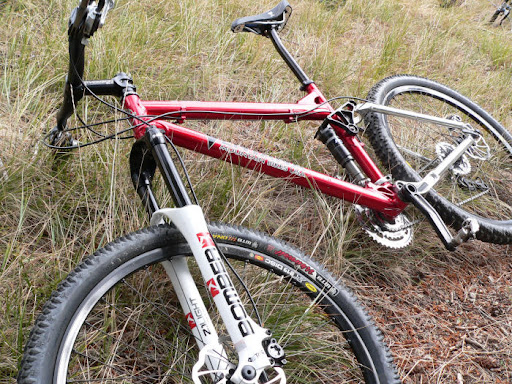
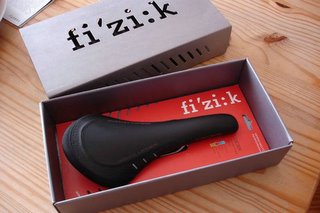
Finally, I've found a perch that appears to fit "my" butt better than all earlier incaranations.

Although I've only ridden with it for a dozen-ish rides it's already getting rave reviews, enter the Fizik Gobi. It's quite a pricey little number to buy at UK mrp (£75ish) but they occassionally pop up in the bike classifieds, for mucho less - which is where I sourced mine.

My earlier saddles incl'd a couple of cheap Specialized Body Geometry's and WTB's but none were truely comfortable over a couple of hours riding. With the advent of my new ride I took advice and opted for the WTB Shadow which was a minor improvement but still had me looking for excuses to get out of the saddle. However, it did highlight that it's particular shape was pin pointing a couple of spots on my sit bones which prompted me to investigate alternatives with a slightly different shape. The smooth contours and "hammock" style of the Gobi are now working wonders for me and the flexi wings apparently mould to your particular contours even more over time so my grin should increase as they sag !

The 270g Gobi weighs in a teeny heavier than the Shadow it replaced at 210g.

Verdict; Although cheap, gel filled saddles may look comfortable initially IMO you'd do much better experimenting with different shaped and sized perches and keep the gel to a minimum.

Nor does cheap imply comfortable... Posted by Picasa

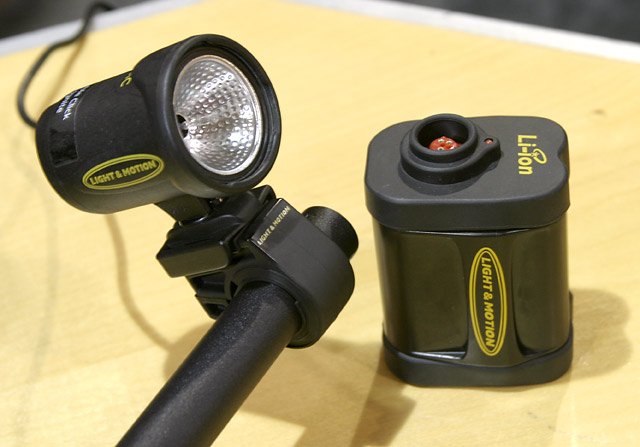
Which Light ? - Light & Motion ARC

It's that time of year again when the darkness takes a hold over most of our day and we need to dig out those lights in order to keep riding. I did this a couple of months ago and found that my good ol'DIY bodge-it, halogen unit was even heavier than I remembered at around 5lbs. I've happily run this 20w puppy for at least two winters but msTurner looked shocked when I approached her with it, "okay, okay, I'll look for something else."

A few magazine reviews and hours of web browsing later presented me with a couple of options. Upgrade my SLA (sealed lead acid) battery to NiMH (nickle metal hydride) which'd be much lighter. Wait until LED's are more powerful and then go shopping. Purchase a lighter NiMH powered system, probably with halogen bulbs. Or take the plunge and opt for a bright HID (high intensity discharge) unit with a light L-Ion (Lithium Ion) battery. Much depended on the £'s but I also wanted a replacement that'd be a significant improvement over da bodge.

I contacted my trusty suppliers in the USA and Chad came back with favourable prices for JetLights and Larry with Light&Motion. Price hunting in the UK just turned up the old adage; "rip off Britain" but manufacturer's worth a mention are; Lumicycle and Rush. The US run MTBR website provided a very useful insight into most options available and I especially appreciated the light beam comparisons, the specification table is also handy.

Time was tickin' on and the L&M ARC was starting to look like a decent option for me. I also understood that Larry was making an order in the very near future so I took the plunge and request one be sent over the pond. Why'd I select it ? The HID bulb isn't off the shelf with the standard casing and uses their own reflector which gives an excellent long range spot yet stil with ample floodlight spread. The battery is tiny (rumoured to be made even smaller soon) yet has a runtime that will suffice for long evening jaunt's. If I do need to carry another then it's so light that I'll hardly notice it in my backpack. It's also been well reviewed, should provide ample light, is compact, charges fairly quickly, simple to use and light weight. Plus msTurner seemed to like ! Although the charger came with a US mains plug it uses a standard old school "kettle" style cable which was easily swapped for a UK equivalent. The L-Ion ARC weighs in at 1.2lbs, around 4lbs lighter than my trusty ol'DIY jobbie and is so much neater. It also only cost half UK retail at approx £220 (incl'g shipping/duty/VAT) compared to £450...

In use the system is very easy to setup and was mounted up with any problems. The bar clamp will fit both standard and oversize bars and the screw fitting clamps up to any tension you want - I usually have it a little on the loose side so that I can dip the beam and it's also less likely to get damaged in a crash. The L&M mount also incorporates a break away mount to help save the bulb in a crash and if you look deep in the box it also comes with a helment mount - which I've not tried yet. On the bike, just a single plug fitting is needed which looks secure and weather tight. The lamp has two settings; 13w (60w halogen equivalent) and 11w (40w equiv) which don't provide a great deal of difference to the light yet give another 30-45mins burn time.

On my first few rides the harsh, white light emitted from the HID seemed odd compared to the softer, yellow halogen lamp. However, the brightness is most definitely the biggest improvement and has to be seen to be believed. Some don't like the spot of L&M but I thinks it's great for those high speed Millenium Falcon speed runs thru the woods. It helps you to spot that log or low branch long before it comes as a BIG surprise ! As my night rides are typically less than 2.5hrs I've had no problems with the battery running down and tend to leave it on for the duration, even during stops. HID lamps have a relatively short life which is greatly reduced by switching on/off repeatedly, plus then take a few sec's to warm up after each off.

Can it be improved ? Overall, I'd say that it's a crackin' little system that allows you to ride into the darkness almost as fast as during daylight. It might just have one possible short coming as I'd actually like to see a reduced low power setting so that it'd be more useful on the road. At the moment I tend to swing the lamp down and into the verge. Having said that, the relatively high settings are great for getting lazy drivers to dip their main beam if you swing your ARC across their bonnet !

Saturday, September 24, 2005

Ridgeway "Enduro"

At some point, prob'ly during a drunken haze, Lee and Shaun dreamt up the notion that riding the Ridgeway would be a grand goal for 2005. A close look at the route suggested that it would be "do-able" in a day provided that a swift pace was maintained. After all, the tracks are long established, mostly vehicle sized tracks and not nearly as knarly as those we'd earlier ridden in Wales. So it couldn't be that tough ?


The day started before dawn and Sue had kindly volunteered to shadow us in a chase vehicle throughout the day. Fortunately, the weather had been relatively dry for a few wks before hand which boded well for the first half of the ride which is mainly off road. Some forum biker's mentioned that these 40miles alone had taken 10hrs to complete the previous October ! They also indicated that to ride the entire trail in day is best done in the hieght of summer and even then it takes a mamoth effort, gulp. We hit the trail at around 8.30am and were greeted with a sky full of approx 20 hot air balloons which highlights the favourable conditions that morning. The first 10miles or so were fairly slow going as the track is deeply rutted by 4x4's which meant a full pedal stroke had to be carefully timed. We managed to pick up the pace a little for the next 25miles-ish with a mixture of short asphalt blasts and hard packed clay or gravel surfaces. We had a brief snack break at Whitehorse Hill and by our lunch stop in East Illsley at Crown & Horns both riders were defo in need of a break with Shaun's aching back (h/tail didn't soften the often lumpy trail) and Lee fighting off leg cramps.

Revived after some fab nosh both riders stomped back up the hill with revived legs to pick up the trail and thoroughly enjoyed the mostly downhill run to Goring on the Thames for a mandatory photo stop at the halfway point. Rather than taking 10hrs we'd managed to complete this in around 4hrs with the favourable trail conditions.

The next 20miles were cranked out on mainly asphalt back roads with the accumulated distance taking it's toll on Lee the MTBer, whereas Shaun the roadie was just getting into his stride. We ducked off the trail at Britwell Salome and found Sue curled up and pushing the z's which finally broke Lee's spirit, not helped by a recent off after misjudging a gate, so he ducked out after clocking 60miles.

Shaun was underterred (the hero) and after swapping his knobblies for slicks and slapping on his lights off he sped to hammer out the final 20miles or so. Without the MTBer in tow and now on road tyres Shaun managed to increase the average MPH and eventually arrived home, just past the official end to the ridgeway at Ivinghoe Beacon, an hour or so after dark.

Afterwards, hot baths and a few glugs of a suitably alcoholic beverage helped to ease the aching bones.


Trail Head
; Ridgeway start - s/w Avebury, 8am
Stats, Shaun; 88.5 miles, 5,754ft ascending, 11hrs 45mins
Lee; 59.7miles, 3,771ft ascending, 6hrs 46mins

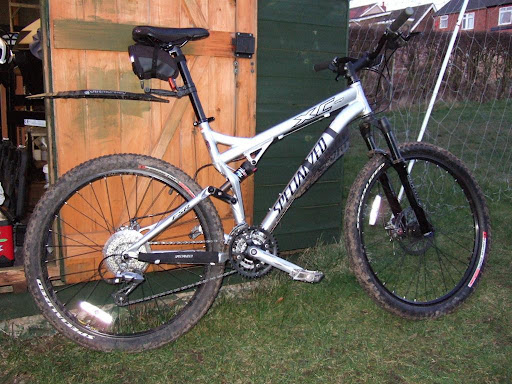
Posse; Shaun (Giant XTC h/tail) Lee (Turner 5Spot)

Injuries; Fairly uneventful although at the end of Lee's stint, misjudging a transition he wiped out.

Mechanicals; Zip, not even a puncture. Hurrah.

Weather; Clear sky but slightly crisp all day.

Friday, September 23, 2005

Hopton Woods - Shropshire


Spent a couple of days over at Hopton Woods at the weekend while David practiced and took part in a Downhill race there.

Hopton is a compact site mostly about the downhill course, but there are some waymarked trails and nice, if short, singletrack. It is worth getting a map before you go - contact Pearce Cycles in Ludlow who were involved with developing the trails here. Or here. Rule seems to be use the greens and ambers to work your way up and then down the reds.

The Downhill course is rideable on an XC bike - it was interesting to see all abilities on the course, some taking 'big air' and others taking the 'chicken' lines. There is probably not enough here to keep you busy for the day. However, you are not far from the Mortimer Forest and Bringwood areas, (Near Ludlow), which offer loads more riding, though local knowledge is helpful here. There are also bridleways running away from Hopton which could make an extended ride. Ludlow is also a fab place for the family to visit with loads of shops, cafes, the castle and so on. One of my favourite parts of the country.

This weekend arrived about 2 days after my 5 Spot frame arrived in the Uk and I was still putting the final touches to it on the saturday morning. It performed brilliantly over the two days, only problem I found was the seatpost chosen had too much layback and so the front wheel tended to lift on sharp climbs - since changed this and the stem and this tendancy has gone.

David felt he did well in the race, but was exhausted by all the practice runs - despite having the luxury of an uplift - he certainly looked impressive over the jumps!

More Pictures

Saturday, September 10, 2005

Thule Bike Rack #9403

On our old coupe I had a roof mount bike rack which was fine as the car was low so I didn't have to raise the bikes too high. You could also still get into the boot but the bikes were exposed to the elements and not thoroughly secured. Since acquiring the jeep we initially used bike bags which kept the car clean and the bikes protected inside the vehicle so we felt like we could go for a bite to eat. The downsides were the repeated dis-assemby, re-assembly numerous times on a single trip and the fact that the rear seats had to flipped down. The bikes were also piled on top of one another which risked bending brake disc rotors and rear der hangers.

Now that the jeep has a towbar fitted we thought that we'd try a tow bar mounted bike rack which is low and easy to load/unload. It keeps the bikes out of the airstream and doesn't damage the mpg as much as a roof mounted rack. You can also keep a eye on your pride and joy as the bikes are visible in the rear view mirror, unlike a roof mounted rack. It's also easier to secure the bikes, keeps the inside of the car clean and we can still use the rear seats / boot.

At first I was a little sceptical how a tow bar mounted rack would work but in use the bikes are well secured and don't flop around at all. Another bonus is that fitting / removal is fast and easy with just a single bolt / lock. We've currently only mounted two bikes, nose to tail and we find that the saddles need to be slid out of the way to prevent chaffing with the bars / levers. I suspenct that mounting three bikes of a similar size would be a challenge.

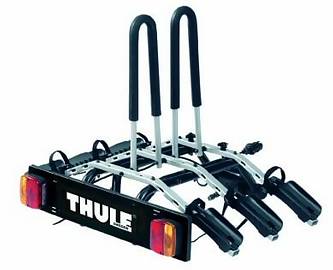
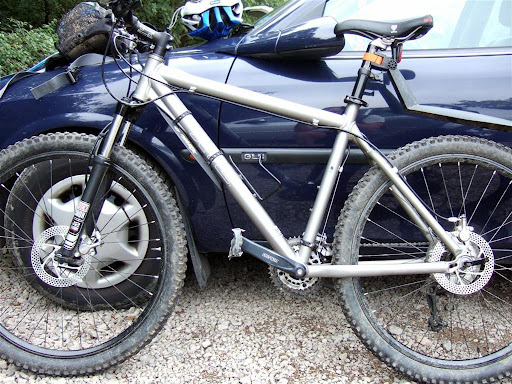
As you can see from the pic, we opted for a Thule model which can carry upto three bikes and also came complete with all the electrics. Model = Ride On 9403. The two vertical supports work well to support the mainframes whilst the wheels are secured to the base. These supports are well padded and lie flat when not in use and make hanging it on the garage wall a doddle. Our model also had the ability to tilt back, in theory still providing access to the boot. Perhaps it's just our vehicle, but the angle of tilt is insufficient to lift the tailgate more than a couple of inches if you have a bike mounted on the "inside".

Overall, I'm mighty impressed with this option for transporting bikes especially as it was cheaper (approx £100) than a despoke roof rack and a couple of bikes racks for our coupe (£130).

Thursday, September 01, 2005

TF Tuning report

Dan goes Push'd
Intrepid reporter tries out a Fox Float R with TF Tuned Shox PUSH technology

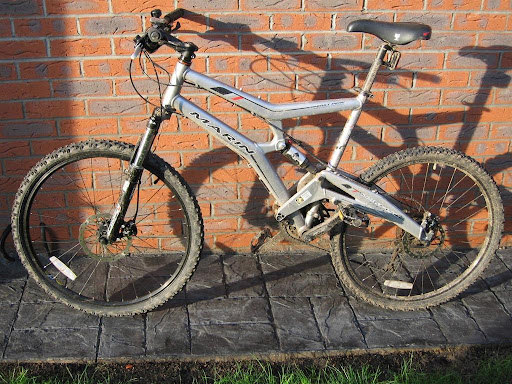
After trying out Farq's Turner around Cannock Chase, I thought it was about time I tried to retro-fit some sort of pro-pedal damping to my Marin Rock Springs. The suggestion from Mr.F was to take a look at TF Tuned Shox near Bath, so I promptly ripped the Fox Float R out of the Marin, booked it in, packaged it up and sent it off.

The service from TFT involves them fitting what they call their PUSH technology into your existing shock housing. Provided it's in sound basic shape, they fully rebuild the unit with new seals and bushes and give it a thorough checking over (and fit the PUSH bits, of course, which I'm assuming are just some clever valving components).

The service is tailored to you - your riding style, your weight, your bike - all entered on a form which you post off with your shock. They turn it around in double-quick time and I was amazed to find it back in my hands mid-day Wednesday (after a Monday posting). It was back in the frame even quicker :)

First impressions were that it just felt like someone had put way too much pressure in it, and it was just very firm. Without any serious trails, I resorted to testing in the back garden. I reset the shock's cock ring and gently rode around, riding 'properly'. The bike felt firmer and more in control at the rear, but not uncomfortably so, hinting that the shock was doing it's work effectively - a check on the cock ring showed there was indeed plenty of travel, but it simply wasn't registering on my bum. So that's good then, I thought.

The "PUSH" effect (reduction of rider inputs) was harder to test and is more down to rider feedback. I tried some wally riding (standing up on the pedals and hammering away like a nutball) and naturally there was no chance of the shock ironing all that out; but it did feel better. The test, however, is rather pointless because I never ride like that anyway.

I did a gentle ride over flat ground versus a hard pedalling ride (staying in seat and riding properly) and there seemed very little difference in the travel used up on the shock, which would seem to be a rather unscientific way of proving that the PUSH damping was working. If not, the heavy effort would have shown more travel on the shock. Hey, I'm no John Whyte but that's the best I can come up with.

The PUSH upgrade itself costs £45 and most of the time the guys will only undertake the work as part of a full service (£75) - this I had done at the same time anyway, so the total bill came to £120. It seems a little steep but the PUSH-aspect itself is worth the money. If your shock is in perfect condition, the service wouldn't be necessary ofcourse.

All in all, money well spent if you have a bike with a non-PPD shock. Who needs Horst linkages (clearly Turner don't!). TFT's service is impeccable, quality of work is excellent and turn-around most impressive. Go on; push the boat out ....

Monday, August 15, 2005

Hope Mono M4's

With the purchase of my new steed I looked around at all the hydraulic disc brakes available and at the time the Mono M4's were one of the top options. Not only did early reports indicate that they worked well but they also had some nice engineering features such as different sized pistons to aid modulation. They also look the dogs...

I'd spent three happy years with Hope C2's and they never gave me any trouble. However, brake techonology had evolved since then and I also wanted to try a larger diameter disk in exchange for more power for less effort. On some of the longer decents in Wales, I found that the C2's could give me Popeye like forearm "pump" as I squeezed the hell out of 'em.

The M4's were duly purchase and fitted to my 5Spot which was a fair hassle as the IS mounts mean that aligning the calliper against the disc requires re-shimming a whole bunch of washers. I also hoped that the first few rides would free up the odd lazy piston but in the end I had to remove the pads, hold 3 pistons back and pump the lever to free 'em up. Repeat until all pistons move equally(ish).

I eventually chose 180mm rotor's front and rear which seems more than adequate to haul up my mass. However, I would be interested to see if a smaller 160mm rear disc would be a better match as I have to be slightly more careful with the rear brake. It's not a problem as you soon get used to it, but then I do like to ponder and tinker...

Ensuring that the disc tab's are straight 'n' true is highly recommended as any misalignment seems to result in noisy, squealin' brakes.

The levers fit snuggly next to my SRAM shifters and have a reasonable feel, not grabby and nor are they vague.

The complete brakeset (front & rear) incl'g the 180mm rotors, etc weighs in at around 2.1lbs. Which compares favourably with C2's that had smaller 160mm disc's fitted to my ol'Marin, coming in at 2.7lbs all in.

After being thoroughly bedded in on our local trails, we headed over to Afan for some proper testing. I found that full stop braking was easily achieved with single digits and that I was now riding much smoother as I had such a powerful reserve of speed shedding ability. I was also pleased to find that my forearm's weren't aching anymore.

More miles were put on the brakes and they've performed reliably, in both the wet or the dry. They did have a few weeks where they squealed throughout entire rides but I've since put this down to pad contamination, possibly after using car wash 'n' wax. This was soon cured after blasting the pads and disc's with Isopropyl Alcohol, as found in Maplins for cleaning circuit boards. They occassionally howl after standing for a day a two but they soon scrub up and shut up after a couple of stops.

By the end of the summer, I'd managed to put something like 900 miles on them with the original pads still having around 3/4's left. However, one wet, 18 mile around Cannock Chase soon saw the pads disintigrate and braking was limited throughout which has been the only hiccup in thier performance. I wasn't alone tho, 'cos by the end of the ride our pal uphilla (with his Shimano XT 4-pots) were also down to their backing plates.

If I have one gripe it has to be that the pads don't retract into the callipers very well which causes a little brake rub every now and again. Provided the discs/pads are cleaned with Isopropyl then I haven't found squeal to be a regularly annoying problem like many reviewers sugguest.

After the wet ride around Cannock, I've had a pair of Galfer pads in the rear which appear to be quieter, have the same feel / bite and don't seem to wear as quickly as some would suggest. Although our "alpine" stlye Bedfordshire trails aren't that demanding...

Overall, I must say that I'm impressed with their performance and if the long term niggle of dragging pads could be resolved then they'd get 10/10.
Monday, August 01, 2005

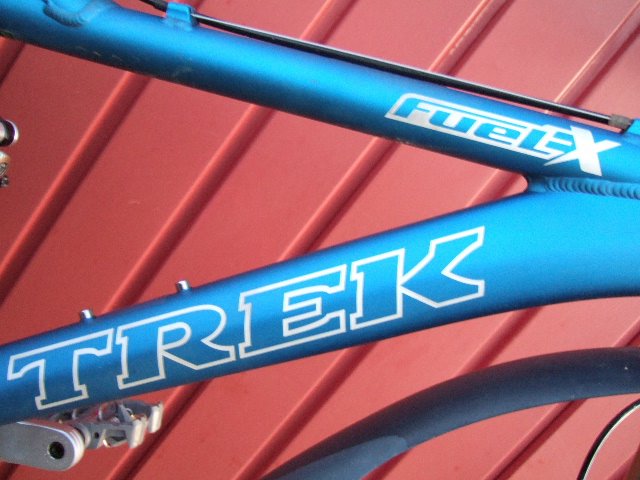
New Bike: Trek FuelEX 9 WSD

Posted on behalf of Chipmunk...


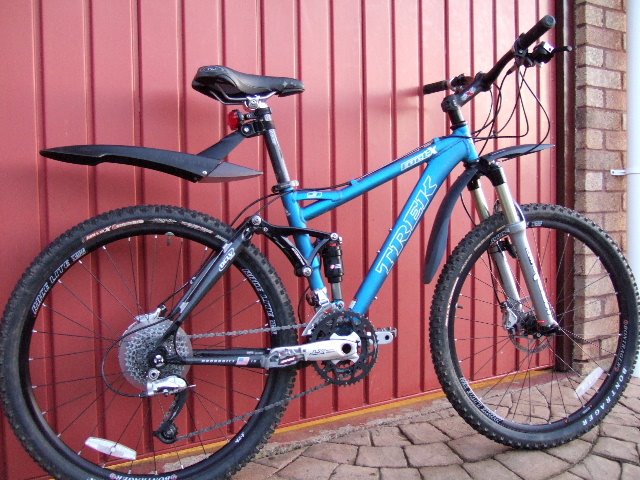
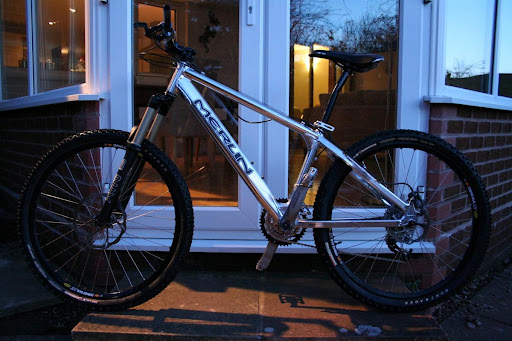
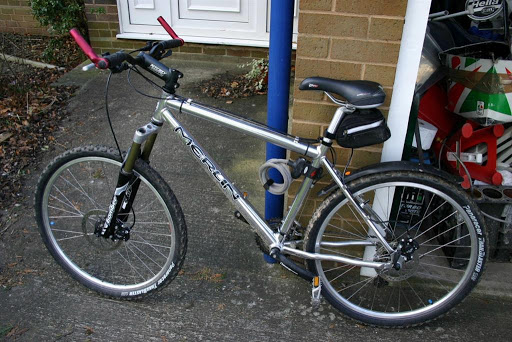
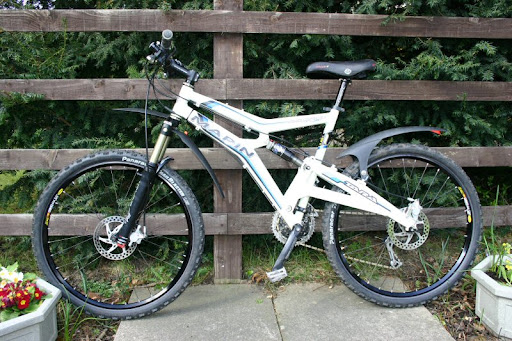
Having ridden a Marin Rock Springs for three years and never really feeling 100% confident or comfortable(!) we decided that it was time to look around for a replacement. It's also reasurring to see that manufacturer's are now gradually expanding their range of women specific rides. A rough short list had us looking for; Trek FuelEX9 WSD, Scott Genius Contessa, Specialized FSR XC (& Comp) Womens.

It took a while to locate any local bike shops that stocked women's bikes let alone those that we willing to let us have a test ride. Eventually our perseverence paid off tho as Pitsford Cycles had a medium/16" Trek FuelEX9 WSD demo available. A number of laps around the lake later and mucho fiddling with the settings by Farqui (can't he leave anything alone!) and we'd found a machine that felt much more stable, was easier to pedal (with less bob), lighter and much more comfortable. The Rockshox Poploc system on both the front and rear shock really rewards all your pedalling efforts in the locked out position and even Farqui had trouble keeping up on a blast over the damn. Whilst there, we found that another lady had just test ridden a Specialized FSR XC Women's and even tho they'd just put down a deposit she was kind enough to let me have a spin around the car park. Compared to the FuelEX it didn't feel as immediately comfortable but it did have a crackin' saddle! - a lady's BG2.

We managed to kick tyres and whiz around the car park on a Scott Genius Contessa over at Rutland Cycling but as it was their display model we weren't allowed to venture around the lake. A few more calls and the most helpful Buckingham Bikes were able to source a medium Contessa for a weekend demo. A return trip to Pitsford allowed us to compare the FuelEX against the Contessa over the same terrain and overall I'd have to report that the Scott felt more nimble, racy and had the most un-female friendly saddle on the planet ! The 3 position, adjustable rear shock was good and made a marked difference to the ride.
A couple more return visits to Pitsford comfirmed that the medium FuelEX was top of the shopping list, especially after trying the smaller 14" which felt much too cramped. Shopping around we found that Cycle Surgery were offering us the best deal and although supply was thin (with new stock on the horizon at this time of year) they were confident that they'd be able to source one. A few weeks later and Rob graciously collected my new ride which was in fine health apart from a sick rear wheel, which was temporarily replaced with a nasty, heavy Specialised unit Trek could source a replacement a week or so later. The first few rides around our familiar local trails were very encouraging and so much easier than my old bike.

A few weeks on and I felt that cockpit was perhaps a little cramped. As the original stem was only 70mm we sourced a 120mm replacement which calmed down the steering nicely. After a couple more rides, I still thought that the cockpit could be made a little longer so the 5mm layback seatpost was swapped out for a 20mm. The next ride was around the unfamiliar territory of Sherwood Pines and I immediately felt much more relaxed and almost 100% more confident, if that's possible. That such subtle adjustments can alter the ride so much is quite amazing. Reading the latest magazine review of a women's FuelEX it appears that this is not an uncommon complaint which is comforting that we already understood the issue.

The only other adjustment has been to fit a Specialized BG2 women's saddle like the one I briefly tried on the FSR XC. The original Bontrgager saddle was exchanged at the point of sale for a Specialized Dolce which looked comfortable but still left me with hot spots.

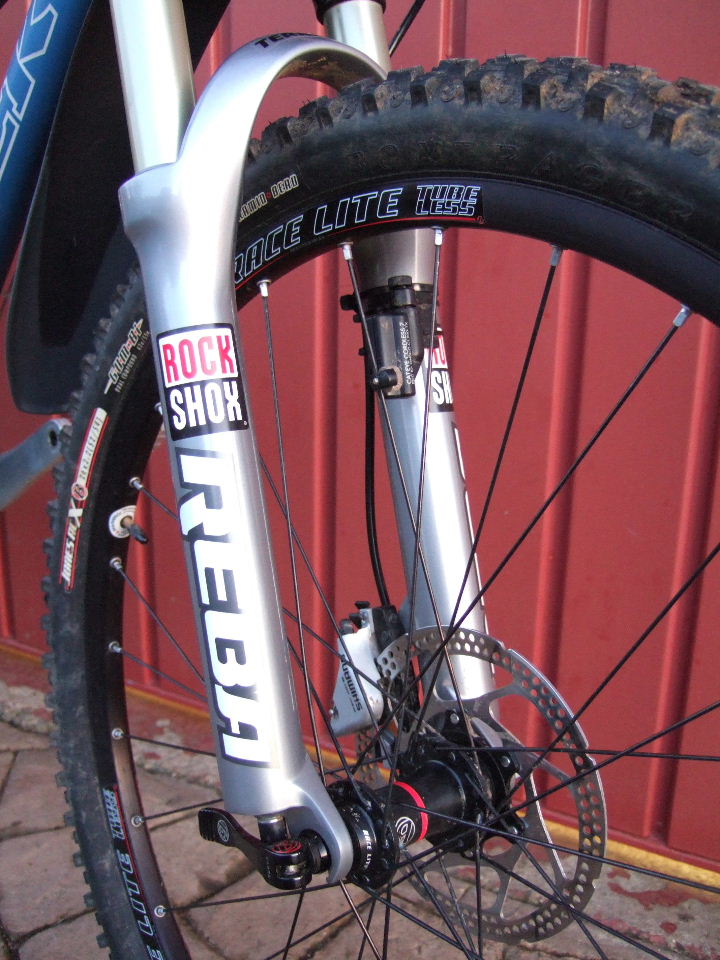
So I'm now the very proud owner of a bike that I find hard to fault. It's pimped out with carbon loveliness, top flight Shimano bits, reliable Rockshox suspension and I've found that I even like the Shimano integrated, flippy shifter thingies - which drives Farqui nuts when he's trying to setup the gears, hehe.

Monday, July 25, 2005

WSSR - Afan Forest, s.Wales

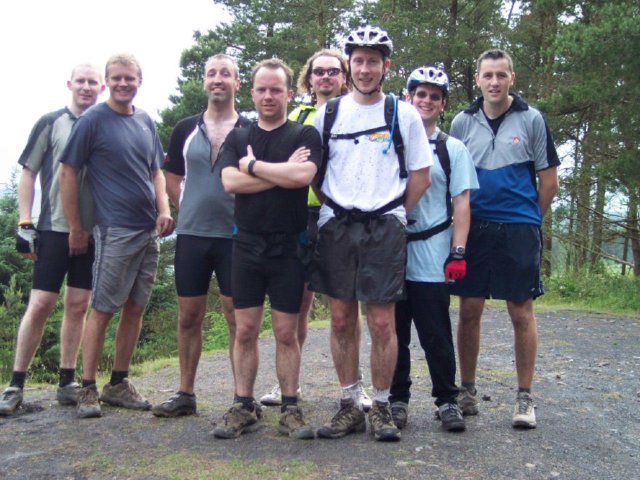
Meet the posse who ventured into south Wales for the Welsh Summer Solstice Ride at Afan park. A thoroughly scary bunch of bikers to ride with !

Two days fantastic riding were in order (for some) with a full contingent on The Wall and Penhydd trails on Saturday. I'll excuse Dan's later arrival and still cuss BrayDrude's unfortunate x3 punctures followed by a busted QR ! The stones were against you today Drude.

Sunday saw an enthusiastic Ben with Roger and Farqui tagging along to keep him company further up the valley to ride the July trail.

A bunch a pic's can be found here along with routes.

The accomodation is also worthy of a mention as Brumster managed to book us a couple of corkin' cabins that although remote were actually within a stones throw of an Afan trail.

Posse (left to right); Ben (Specialised h/tail) Tim (no-name h/tail) Farqui (Turner 5Spot) Nat (an "Aldi" style susser) BrayDrude (Giant XTC h/tail) Salty (Marin East Peak) Brumster (Marin Rock Springs) and Roger (his brand spankin new Specialised FSR XC Comp - with a big thanx to Rob).

Injuries; I can't recall any major incidents, tho I'm sure a few off's were experienced by most.

Mechanicals; BrayDrude's numerous punctures (later id'd as a duff batch & too small!) and his broken rear QR as he attempted a quick 3rd blown tube in succession without even turning a wheel. Oh and Brumster had some natty tubes which blew up like shotgun fire on the car park trackpump.

Weather; Glorious and dry with Sunday proving to be a scorcher for those who chose to kick back and relax at the equally fabulous cabins. Posted by Picasa

Thursday, July 14, 2005

GPS software - Tracklogs

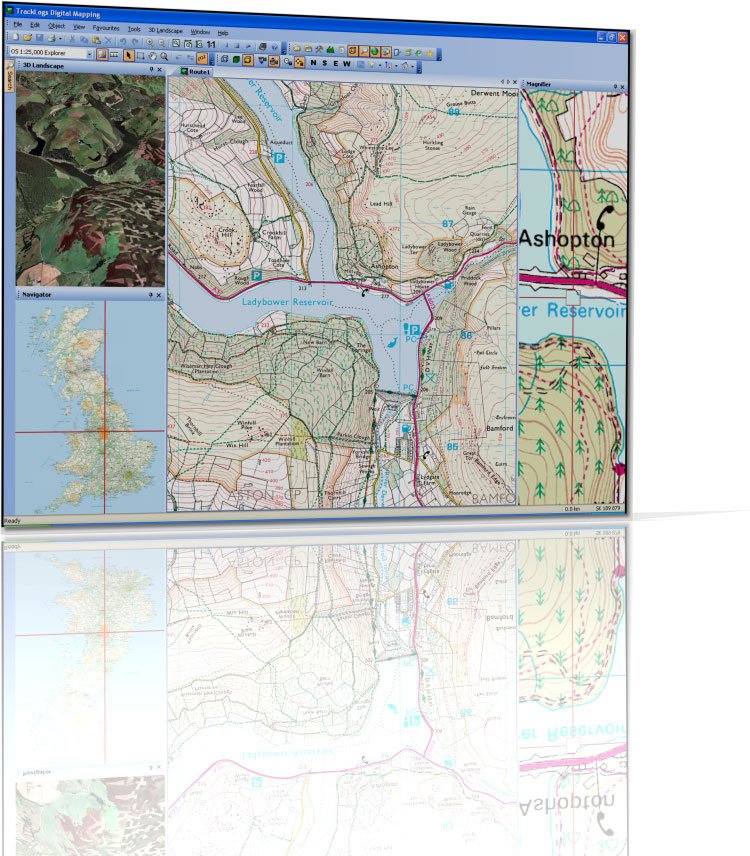
The more observant amongst you will have spotted that some of my ride reports/Blogs have a corresponding map attached, created using Tracklogs. PC based piece of software that allows you to create new routes during those idle, wet, long dark winter evenings when you dream of some tasty singletrack to attack in the better weather. You can then upload these 'routes' into your GPS unit which'll dutifully guide you along your chosen trail from the convenience of your bars without the constant need to stop and unroll that gradually disintigrating map you just bought. Not only that, one your legs are tired, your grin is large, your bike looks like a chocolate brownie and the route is complete, it'll have stored all your route data (speed, distance, altitudes, etc) ready for reviewing back on your PC !

Most of the major GPS software packages are listed below and as their websites lists all their features I won't bore you with the technicalities, but I will highlight what found were their main points;
  • Anquet Is very similar to Tracklogs but I found the PC route making process fiddly and complicated as you need to create 'legs' first that are then combined to make a 'route'. However, with hindsight this is kinda useful as common sections of your local trails can be created once and then easily re-used when you create a slightly different overall route. Overall, I didn't find the s/ware intuitive or easy to use.
  • MemoryMap Is used by most of the biking/walking magazines but when I was looking they didn't have a demo version available. However, it does offer all the features available in the other packages. Perhaps someone can chime in and give us the gen...
  • Tracklogs Was the most intuitive s/ware I demo'd that allows routes to be quickly created. It also has a bunch of features that I thought were useful, more detail below. The pricing structure also appealed more than Anquet. It's now also becoming more widely used on tinterweb - Rob's now also using it ;-)
  • GPSU - Freeware, basic software that doesn't come bundled with maps - these are downloaded separately from a number of possible sources which makes the installation and configuration more cumbersome than the 'pay' packages above. One bonus of this s/ware is that it is able to convert routes between different file formats, so if you located a route on the web that's Anquet based then GPSU can convert it to say Tracklogs and use or modify it yourself.
All the packages now have demo versions available allowing you to evaluate the software for yourself. Though note that certains functionality may not be available...

Maps : All the 'pay' packages listed above have different pricing structures for their mapping converage and it's important to get a handle on this prior to purchasing. It's also worth pointing out that maps are available in differnt scales and OS types to better match your needs. Personally, I've had no problems with 1.50k scale maps and have the whole of the UK covered for a reasonable cost. Rob however has taken a different approach and uses the more detailed 1.25k maps and just buys an area at a time. To cover the whole of the UK this way would be very costly indeed.

Routes : Online routes can be downloaded from the software website above or try these; MountainBikeRides, MTBRoutes, NorthernRoutes (which is the most comprehensive I've found to date), RouteSource, etc.

Tracklogs : Why did I select this particular software ?
  • Routes : It's very easy to create routes/tracks by adding more track points or waypoints, all of which can be easily modified or removed later. Routes can easily be annotated to include key navigation comments which are then available on the 'route card', see below. You may also choose to add icons to your map that highlight common trail obstacles such as styles, gates, pubs, hazards which help to make the map useful to those not familiar with the trail.
  • Evelation Profile : Once a route is starting to come together you can start to see an elevation profile of the route which helps highlight the gradients involved. This may also show your speeds overlaid against the underlying evelation data. I've just started to explore adding additional information to routes such as the trail type i.e. grass, gravel, asphalt, tow-path, etc (all customisable) which can then show up as different colours on the profile - further helping you plan your ideal route.
  • Maps : Are all scalable so that you can review a route in it's entirity by zooming out or even quickly centring the map around your route. You may also zoom in on a particular section for more detail. All the information typically associated with a 1.50k OS map is available, including the legend.
  • Duration, etc : Tracklogs allows you to show speed, distance, elevation, etc data either as recorded from your GPS hardware. Alternatively, you can choose from a number of configurable alternatives within the Naismith Model that easily allow you to show duration times when Walking, MTBing, Road Riding or even Fell Running !
  • Route Card : Is a very handy feature ths is available in all routes that can break it into different sections, complete with distances and addtiional notes. These may then be printed on the reverse of your printed map thereby highlighting any difficult navigational areas that the map alone can't show. Your route properties can also be printed which might include a start time, location and any other details you feel are pruduent.
  • Printing : Your route can be printed out using the excellent print wizard which is great for selecting (and previewing) the map scale or positioning, etc. Printing also allows for the 'route card' information to be printed on the reverse along with handy route details such as the trail start time, location if a group of you are meeting somewhere unusual. Maps may also be printed without route data overlaid, again to a chosen scale.
  • Hardware : The interface to my Garmin eTrex didn't initially require any manual configuration or fiddlin' and was automatically located. The Tracklogs 'transfer' dialogue makes it simple to download and upload routes from all those stored within the GPS unit. I haven't had any issues with compatibilty although one shortfall of the basic eTrex is that it can only handle 124 waypoints per route which means that longer routes are truncated. Tracklogs can even handle this and allows you to break your long route up into shorter routes and stores them separately on your GPS unit. I opted for one of the cheapest unit's Garmin produce (it was on offer) as I figured it'd be less of worry if it broke. Bespoke GPS units also tend to be durable and built for a few knocks whilst outside. PDA & GPS combo's offer more functionality but are more delicate and expensive to replace. Although my unit only cost around £50 it needed a PC interface cable and I also figured that a handlebar mount good, the sum of which almost doubled the price.
  • Support : The intial version I installed just happended to coincide with a major new release of the software which contained a few installation problems. All my queries were answered quickly by the developers and over the months I've been using it I've seen regular updates to the software. So this isn't a package that you'll install, get frustrated with, get no response from the developers and wish you'd never purchased.
Some might consider that GPS isn't necessary for MTBing and I'd agree with them up to a point. I've found the device is a great way to keep the ride flowing, particularly along unfamiliar trails and it's also much more accurate than a simple trip computer in recording your speeds, distances, times, etc. If you're riding a loop and become lost then the unit will provide basic directions back to your start point, which has proved useful on occassion! However, as all but the most expensive GPS units don't yet show any basemap detail, then you really should carry a map of the area along with you, even if it's simply printed out from your GPS software.

If you don't own any GPS hardware then I'd highly recommend it but do beware that you'll also end up splashing out on the PC mapping software to help make the most of it. Otherwise it's simply a glorified trip meter !