Wednesday, June 15, 2005

Time Pedals

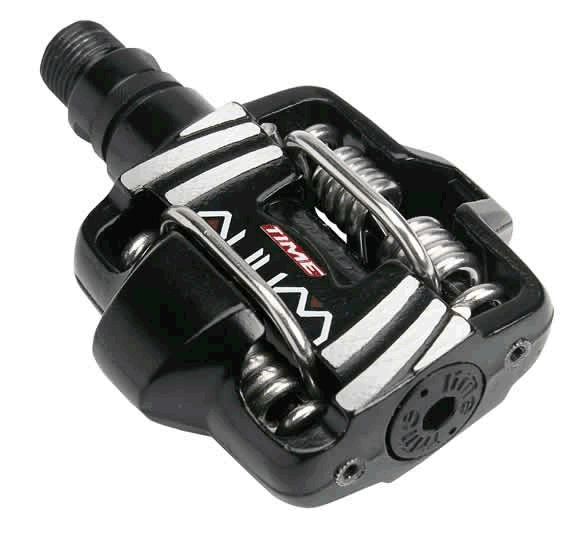
After flopping around on MTB's for a couple of years I eventually got fed up with my feet slipping off the pedals and the loose pedal then impailing itself hard into my shin. A solution needed to be found and magazines/internet mentioned these damn fangled SPD (Shimano Pedal Dynamics) systems.

Upon further investigation it appears that the pedals and shoes have a mechanism that clamp the two together which are released again with a twist of the ankle. Now that might sound a little odd but yonks ago, I'd ridden road bikes (damn it, the secret's out!) when toe clips were common place. If you tightened 'em up they were quite frankly lethal, but at least you typically managed to stay upright on the smooth road surfaces where you also have plenty of forward vision for planning ahead. Off road is another story as the uneven ground is hazardous and you often don't have too long to plan a relaxed, calm dismount when you're whizzing along twisty singletrack.

After studying the options available it became clear that virtually all SPD shoes are compatible with all SPD pedals as the relevant cleat is simply bolted to the underside using a standard bolt pattern. It seems that some shoes can be awkward to use with some pedals, especially if they have deep, rugged soles.

As the hunt for shoes only required a good fit to the foot, I focused on hunting down information on which pedals were available and it pretty much boiled down to two choices;
  • Shimano : Who had a miriad of pedal options from teeny race clips to big flat platforms, similar to those I'd been using but with the shoe retention system. Across the range they all seemed to have a tensioning system which means that whilst learning a low clamping force is applied for easy release. Once you're more familiar with dismounting with SPD's then you can increase the tension which also means that you'll be able to pedal with more conviction and not unclip unintentionally. The flip side to the tension adjust meant that cleat (the bit which fixes to the sole of your shoe) alignment was essentail as the mechanism doesn't provide much if any float and knee problems could result if poorly aligned. The Shimano pedals also had numerous moving parts with close tolerances which must work really well on the road but on muddy surfaces users reported that it was often difficult to clip back in once you'd walked around in the gloop.
  • Time : Who had a limited choice of pedals and no tension adjusters, which kept the pedals looking neat and simple. Without any adjustment they instead opted for a double sided cleat with one side requiring a lesser 13 degrees ankle twist to unclip and the other a more retentive 17 degrees. Their design also allows a few degrees of float which apparently helped to save the knees from a poorly adjusted, rigid clamping mechanism. The simple nature of the design means that tolerances aren't as tight and that they are much more mud friendly when compared to Shimano.
I decided to opt for Time's as I value my knees (afterall, I ride and don't run!) and I also figured that their robust simplicity would be better suited to offroad use. So which model should I choose ? I figured that something fairly basic would be a good start just in case I decided this SPD thang wasn't my cuppa, so I chose the ATAC (Auto Tension Adjustment Concept) Aliums. They aren't very light (at 1lb a pair) but they looked a fair balance of price and function. In use I initially found them easy to clip into (just dip your toe and press) but a devil to snap out of ! A few weeks of accumulating bruises gradually saw a technique emerge along with a crutial ability for the brain to automatically unclip when needed. Although I came close at one point, I did manage to stay out of the canal !

Over the years they've proven to be very reliable with my original set now having covered well over 4k miles without the need for a service. The bearings are still sweet and much to my amazement I haven't even needed to change the cleats which is fantastic as they're now used every week day on my commuter. I've been so happy with them that I even acquired a second set which have shrugged off many a pedal on rock strike. They also work brilliantly off road and you can happily walk through muddy sections and then just stamp the pedals when re-mounting and you're clipped in. No fuss.

More recently, CrankBros have introduced a range of SPD pedals which uses a mechanism very similiar to Time with the exception that they are typically lighter and smaller. The cleats are also very similar and allow riders to swap rides without having to swap pedals. Shimano cleats aren't interchangeable with either of these systems but I believe they are with Shimano-esque versions from say the likes of Ritchey, etc.

There are other SPD's available, which I'm sure other riders are happy with but the Time ATAC Aliums have been a solid performer for me. I've no regrets and I'd happily recommend them to others.

Update: With Chipmunk now seeking to use SPD's and my happy time with Time's (ahem) we've opted for the platform pedal called the Time Z. It provides a larger area to plant your foot if you don't want to clip in and are also sufficiently comfortable to use without cleats/bike shows so are ideal for the 5 minute jaunt down to the pub wearing trainers. However, whilst learning we intend to use some cheapo Shimano pedals with the adjustable tension as I found that Time's (although excellent) do require a great deal of commitment and a fair amount of strength to use initially - until they bed in and you get familiar with the technique.

Tuesday, June 14, 2005

SRAM vs Shimano

After recently making the transition from the "mainstream" Shimano gear shifts to SRAM I thought that I'd "spread the word" and give you the benefit of my experience.

I'm sure that almost everybody will be familiar with the Shimano amd it's MTB groupset with it's various levels of "competence" from the functional yet basic Deore, LX, XT up to the flag ship XTR. But how many of you know about SRAM ?

Background : Until a recently they were a small company building on it's slightly different take to the Shimano "standard" gear changes with different shifters, cassettes, chains. However, they're recently undergone few years of rapid expansion and are "the" company on a roll and are surely out to rival the bigS. They're moving towards being able to supply their own groupset after acquiring the likes of Avid (brakes) and Truvativ (cranks/stems/bars/seatposts/etc). More recently, they also bought out RockShox (forks, shox's) which is fairly big coo and give's them an edge to Shimano as they don't manufacture forks.

The SRAM gear sets range from X7, X9 to the major bling X0.

A number of basic differences separate SRAM from Shimano in the operation of gear changes.

  1. SRAM operate on a 1:1 ratio between the shifters and the mechs, whereas Shimano use 2:1 on the rear and 1:1 on the front. This means that a SRAM system is likely to operate for longer without the need for small adjustments and to be less prone to ghost shifts on full suspension steeds.
  2. SRAM shifter paddles are operated by the thumb only whereas Shimano require both the thumb and forefinger. This was a major selling point for me as having 4 fingers permenantly wrapped around the bars gives a more secure ride over those large boulders. It's also much less strain on the grey cells as only the thumb is in motion.
  3. The rear mech cable routing on SRAM is direct from the chainstay whereas Shimano need a long loop of cable to enter in the rear. The most obvious advantage of a direct cable run is less drag but an additional benefit is that shrubbery is less likely to get hooked along for a ride !
  4. SRAM rear mechs use a much firmer spring mechanism over Shimano. Which greatly reduces chain slap (chain hitting the chainstay), chain derailment when jumping and the mech hitting the chainstay. I can also be a pain to then get the back wheel out ! Update: checkout this thread for a video (approx 28Mb) that helps to highlight the differences.
SRAM also produce a Shimano range of compatible shifters called (rather uninspiringly) "2:1 shifters" ! Fortunately, they're more commonly referred to as Rocket or Attack.

Having previously used Shimano Deore and the midrange LX I can confirm that it's all good kit and works very well, with noticable improvements higher up the range. Converting to the SRAM midrange X9 shifters didn't cause any worries and in operation the changes are slightly less slick but feel more positive. Which I find a bonus when you've a set of full fingers gloves on as I always mis-shifted Shimano gears during the winter as their operation is quite light to the touch. Do they change any differently ? Probably but I'll be damned if I can tell. You'd need a dedicated test rig to figure that out and personally I'd prefer just to get out and ride...

Appart from the shifter ratio's all other components are interchangeable between the manufacturer's and my current rig has SRAM X9 shifters, rear mech and chain with a Shimano cassette and front mech. I've found that SRAM chain's tend to last longer but that probably means that the rest of drivetrain wears a little more rapdily.

The general understanding is that the SRAM front mech isn't as slick as Shimano, all Shimano cranks/bb's set the industry standard for light/stiff, that the top flight SRAM X0 rear mech is the bees-knees, that the SRAM X0 shifters are leagues ahead and that the rest of the kit functions on a par.

You chose which you'd like...

Monday, May 30, 2005

Clent Hills - Worcestershire

It's hardly a demanding ride in terms of
technicalities, but more often than not I find
myself riding places where the missus can come
along too. So, on the cusp of Brummie suburbia, just west of Halesowen, are the Clent Hills. They afford gorgeous views of the countryside (well, except for the one side, which offers a view of Birmingham, of course) and there's sufficient pubs spattered around the area to keep you entertained.


The one thing they do have, and forgive me for stating the obvious, is hills. There is very little flat riding here - you're up and down like a jackrabbits' arse all day - so it's great training on the old pins if you need it. There's no real challenging rides that we found, but there's certainly some interesting speed sections including a nice, fast, gravely downhill section towards the start with muddy bits to catch you out.

If you're okay with the uphill stuff (or willing to take your time) and fancy a gentle days riding around the area, there's worse places (and there's better, I imagine). I could have sworn there's a downhill course there from yesteryear but I didn't see any details of it, and a quick google search didn't throw anything up. It's one of those places where I imagine local knowledge would turn up some much more interesting bits.

As it stands, it's a good days exercise...

Saturday, May 14, 2005

Shimano W101 - Winter Boot

Anyone who rides in summer shoes during the depths of winter and has experienced icy tooties even though they're wearing winter socks will appreciate a decent set of winter boots. True, it's possible to make do but as I commute throughout the year I soon decided that dry and warm feet were essential.

I tried on a number of winter booties from the likes of Northwave, Diadora and Shimano but it was only the latter's W101 that felt comfortable. I normally take a UK size 10 and these needed to be a size larger (euro 46) to still allow a good thick sock or even a couple of mid layers to help keep the cold at bay.

There are no shoe laces to get soggy and the dual velcro straps have been 100% reliable. You also get a 3rd velcro fitting which wraps a semi waterproof neoprene "entension" around your ankle that helps to prevent water running down your leg and filling up your boots. These aren't 100% waterproof and will eventually allow water to ingress over longer rides but they will still be toasty inside. The tread isn't very aggresive and does clog up in deep mud but then what doesn't ? The compound seems durable they're actually ok to walk in, even with the ankle strap. The boots feel rubbery rather than plastic-y and have survived many a rough and tumble with hardly any marks. The SPD fitting doesn't need cutting and hasn't given me any problems i.e. hot spots on the sole of my foot.

If you have a 2nd set of cycling shoes then you'll find that both pairs last twice as long !

Overall, I'm very impressed with just how warm these keep your feet although they'd be better if they were 100% waterproof. 9/10.

Protective Tape

In the past, I've tried a couple of sets of protective patches that are designed to stop cables rubbing paint off your steeds frame (incl'g some wickedly expensive carbon-esque patches from Pace) and non of them seem to stick. I've gone to the effort of thoroughly cleaning the area, warming the patch and even pressing the sucka into position until my pinky's hurt. All to no avail.

However, peeps over on Singletrack seem happy with stuff called "helicopter tape" which I know to be tenacious stuff from my days playing with RC choppers. A quick surf and I found that a bike related outlet called Just Riding Along market such a transparent film. Their smaller 10 x 25cm option will easily accommodate two steeds even if you include additional patches for battery's, etc. The best bit is that it's very competitively priced, especially when compared to the useless patch kits.

In use this stuff is sticky, very sticky indeed and will quite happy curl and more importantly stay curled around headtubes, toptubes, etc. It doesn't wash off and hasn't yellowed when exposed to around a years (to date) regular exposure to sunlight. Ten out of ten.

Friday, May 13, 2005

Shock Pumps

Air shocks have now become thoroughly established in MTB suspension design, in part to the increased reliability of seals, their inherent light weight over a coil spring, compactness and tuneability - changing a coil spring is a costly affair unlike changing air pressure. All you'll need is a shock pump which'll cost roughly what another coil spring would but is so much more flexible.

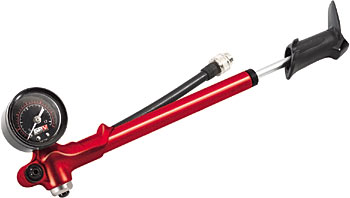
Around three years ago, the choice of shock pumps was quite limited and this Brand-X unit was pretty much all that was available. However, it has a clear and accurate gauge up to a thumping 300psi, a blow off valve enabling you to accurately set the psi and a flexible hose (albeit short) that helps when fitting and pumping. All it's needed throughout it's life is an occassional regrease of the internal o-ring.

However, with the recent domination of air can's lots more shock pump desgins are now available. They're typically smaller, lighter and have a folding flexible hose that makes fitting and storage even easier. The one shown here is a Marzocchi copy and look remarkably similar to those supplied with Rockshox and Manitou equipment. The gauge and blow off valve still remain so the earlier units got something right.

When acquiring a pump you need to be certain whether your shock is a high (up to 300psi) or low (up to 175psi) unit to acquire the correct pump. You'll typically find that Fox bouncers are high pressure whereas any 5th Element, Rockshox, Manitou's SPV and Marzocchi shocks are typically (tho not exclusively) low pressure. Using a high pressure pump on a low pressure shock is viable but they're not accurate enough to accommodate the smaller range of adjustment. The fact that shocks can be used on forks and shox's can make for an interesting set of pumps in the toolbox but most bikes now tend to use either high or low pressure and not a combination - although it's not unheard of.

The valve outer (thread) can often cause a few headaches as we've found that the 5th Element and Cannondale valves are slightly smaller than say a Fox.

Thursday, May 12, 2005

Trackpump : Topeak JoBlow Sport

If anyone has more than one bike to maintain then they'll definitely benefit from a large capacity tyre pump that inflates tyres twice as quick as a standard, small bicylce pump that you take along on rides. You'll not get rsi or a floppy arm from those dozens of stroke you'll need with a small emergency pump.

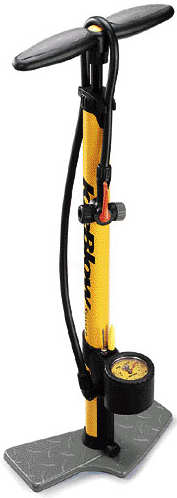
I acquired a Topeak JoBlow Sport trackpump a number of years ago now and it's still going strong. The valve head is compatible with both shraeder (car type) and presta valve's and it always provides a good seal. The gauge is clear and located at the base of the unit so it's less likely to get broken if it topples over. The parts all look durable and study, the shaft / base are metal rather than plastic and the handle is rubberised for a comfy feel.

The gauge is also handy as it allows you to accurately increase the tyre pressure which is often useful if you typically ride XC terrain and are off for a wkend of hurting down mountain steps. I find it also helps when setting both Chipmunk's and my tyre pressure as we both prefer different psi's which often can't be properly gauged by just squeezing the tyre.

Inflation is a doddle once you've planted your slabs of meat on the base it only take a dozen on so long stroke to get 30-40psi whacked into your knobbly's. Easy peasy.

Wednesday, May 11, 2005

Chain Cleaner Gizmo

Over the wkend, Brumster was praising his chain cleaner and how easy it makes the whole process of cleaning the most moving parts on your steed, especially after a grubby ride. Although I've used one for years I'd kinda lost sight of just how useful and efficient they are.

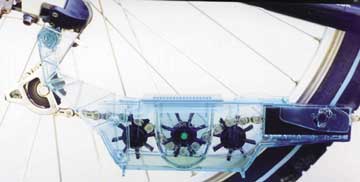
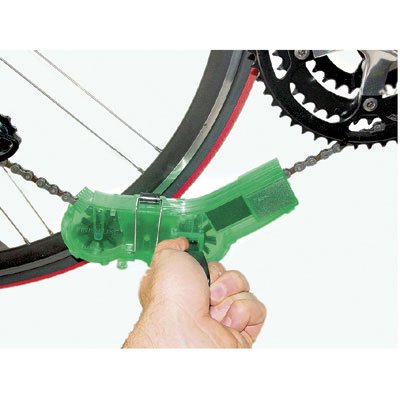
We both use an early incarnation of FinishLine's kit which snugs shut around the chain and rear der allowing you to back pedal the chain through three scrubbing brushes and a set of cleaning pads. Prior to clamping the chain you need to put in a few mills of degreaser, citrus based is more eco friendly. After just a few cranks the degreaser starts to dis-colour and the chain to gleam again. It only takes a dozen revolutions or so - but a few more won't hurt :p Incidentally, the manufacturer's website has some snazzy video's that explain the whole process much better than I can.

But why bother ? First and foremost a clean chain means crisp, clean shifting which gives a much more pleasant ride. Secondly, a clean drivetrain will last longer and not need costly replacement if you regularly clean it down. A chain is so cheap but if it's left dirty then it'll take no time at all down grind down the more expensive cassette, chainrings and der's.

Over the years my cleaner has proved itself and is still going strong which is probably down to how simple the construction is. It's very easy to take out the brushes out for the occassional clean as they just rest inside a couple of grooves. I dread to think how much degreaser I've used but atleast it's mostly been environmentally friendly stuff.

I see that most of the latest FinishLine kits don't have a der hook and rely on you holding the unit whilst cranking, which is fine if you have a stand to hold the bike.

Update, Mar'06 : As one of the brushes within my original kit is now reluctant to stay put (the sides have splayed out) I figured that it was time to acquire a replacement kit. After some surfing it appears that the "old" design has been replaced with this "new" unit.
Although it now no longer seats on the rear der the new unit is sweet to use and the magnet in the base helps to retain any metal shards, the angled operation and extra tension, sealed exit and new brushes mean that the chain comes out much cleaner - definite proof that it needed replacing. So it seems that they've improved a product that was already a winner.


Tuesday, May 10, 2005

Park Chain Checker

There's a generally accepted theory that a chain will bed in and wear out much quicker than other drivetrain components. If you leave a worn chain on it'll rapidly wear out the chain rings, cassette and jockey wheels which isn't logical as they cost much more than a consumable and relatively cheap chain.

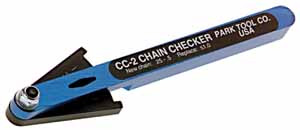
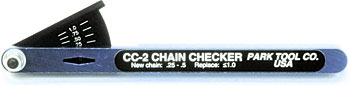
So how do you know when a chain is past it's best ? You can measure the length of 12 links (rivet to rivet) which should be less that 12 1/16", anymore and you'd best start looking to replace it. Another technique is to use a "chain checker", which is a little gizmo that tells you the wear without needing a tape measure. I use a Parktool Chain Checker (cc-2) which shows stretch as a %age.

A positive benefit of using a chain that's in good working order is that you'll have slicker shifting, with a drivetrain that doesn't skip, suffer from chain suck and last longer saving you money for more UGI (upgrade-itis).

Links; Sheldon Brown has some useful info on all things chains, including "stretch".

Monday, May 09, 2005

Wrench Force Prep Stand

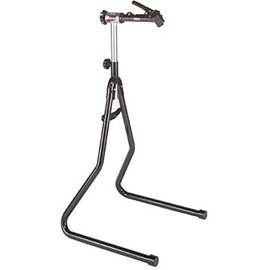
If you've ever done more than 5minutes work on bike then you'll really appreciate a device that holds the cycle securely while you've both hands free to do some spannering. Enter the bike repair stand.

The Wrench Force stand has an adjustable top clamp which can be tuned to grip different diameter seatposts and frame tubing. The clamp itself is a soft plastic with handy grooves for gear cables to route through. The clamp can also rotate through 360-degrees for convenient bike positioning. It has a sturdy frame with a wide base for good stability, but it's weight means that it isn't really portable and is best suited to the workshop. The legs and clamp fold flat for storage, it has a telescopic height adjuster, which means that even tall mechanics can wrench without bending over.

I acquired mine around 2-3years ago from Leisure Lakes and recall that it was slightly discounted to around £100. It might seem expensive at the time but not if you factor in the savings from doing servicing yourself, especially if you have more than one steed to maintain. I've recently had a hunt around the web and can't find many online outlets for this toolstand. It also appears that Wrench Force is a subsiduary of Trek and that Snap On make them, but don't quote me on that.

I've had no problems with it and really appreciate the convenience it supply's. Routine maintenance is now a joy.

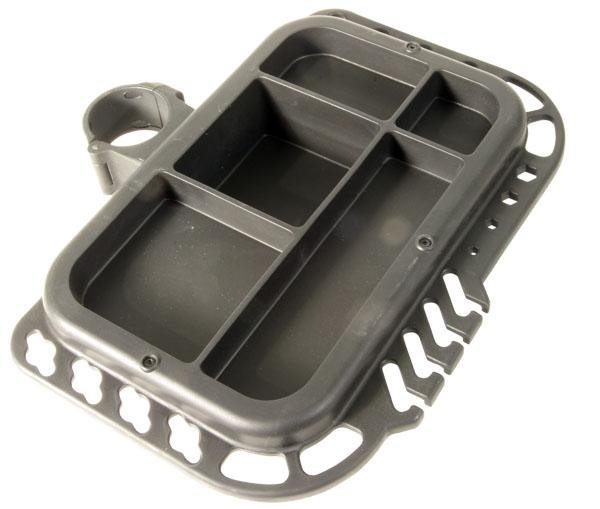
Update: the only addition I've recently made is to tack on a Topeak Tool Tray which helps to keep those tools close to hand.